Webhooks That Wait: Latency Budgets for Synchronous Events
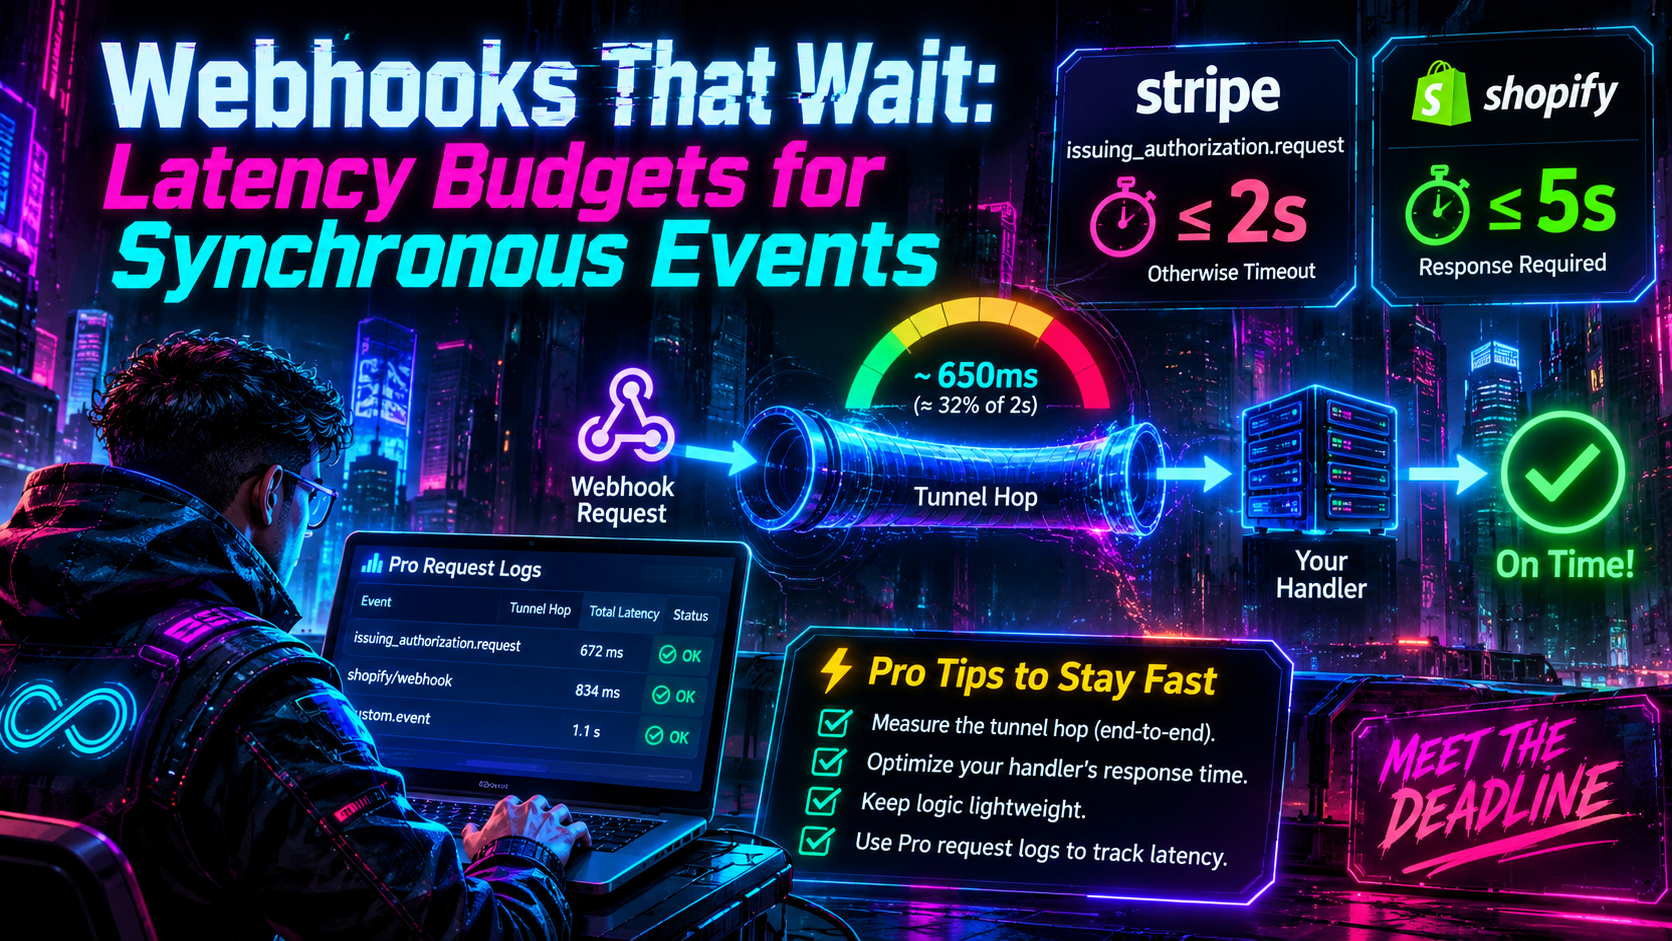
Most webhooks are polite. A provider sends an event, your server says “got it,” and everything else happens later. Some webhooks are not polite at all. They stop a real transaction and wait for you.
If you develop those handlers on a laptop behind a tunnel, you have a new problem: the clock is already running, and the tunnel hop is a slice of it. This guide covers what the budgets are today, how to measure how much of each budget your tunnel consumes, and how to keep a local handler fast enough that you are testing your logic and not your luck.
The two budgets that matter right now
Stripe Issuing: 2 seconds, and the answer is the decision
When a card issued through Stripe Issuing is used, Stripe checks that your Issuing balance has sufficient funds, that the card is active, and that your spending controls allow the purchase. If the authorization survives those checks and you have configured a real-time authorization webhook, Stripe sends an issuing_authorization.request event to your endpoint. If you do not approve or decline within 2 seconds, Stripe approves or declines the authorization for you, based on your timeout settings in the Issuing settings of the Dashboard, or on your Autopilot settings if you have configured them.
Four details from the current docs shape how you design for this:
- The response is the decision. You answer by responding directly to the webhook with a
200status and a JSON body. Theapprovedfield is required. TheStripe-Versionheader is also required on the response, andapplication/jsonis the only content type accepted. - Failure has a name. When an authorization’s
request_history.reasoniswebhook_errororwebhook_timeout, Stripe is not receiving your responses.webhook_errormeans you responded with an invalid Stripe API version in the request headers, or Stripe could not process your response.webhook_timeoutcovers all other failure modes. Stripe also warns against using theapprovedflag to judge integration health, because Autopilot can approve on your behalf during an error. Its own example of something to investigate is an authorization withapproved: truebutrequest_history.reason: webhook_error. Subscribe toissuing_authorization.createdandissuing_authorization.updatedto watch for these, and readrequest_history.reason_messagefor detailed error text. - Fallbacks exist, but they are not your logic. Autopilot, currently in public preview, makes decisions on your behalf from a predefined set of rules when your systems are down, do not respond, or return an invalid response. You configure it by contacting Stripe support. A separate Stripe Autopilot (also public preview) is for users with their own dedicated BIN. It helps when the card network cannot reach Stripe, and those decisions are labeled
network_fallback. Neither is a substitute for answering in time. - Not every purchase reaches you. Only authorization requests go to the synchronous endpoint. Other notifications go to your regular webhook endpoint. If your Issuing balance is too low, the authorization is denied and your webhook never sees the request. Spending-control declines happen on Stripe’s side too. If you have no real-time webhook configured, Stripe approves authorizations that pass its own checks without sending the request.
Why this is suddenly everyone’s problem
Stripe’s documentation for Issuing for agents describes giving each agent its own virtual card with per-agent spend limits, merchant category controls and custom authorization rules. It also states that once you pass a card to an agent, every purchase attempt triggers a real-time authorization request before the charge goes through. The same page says there is a 2 second default timeout to respond before Stripe falls back to the card’s default rules.
Stripe’s guide for programmatic checkout adds a second path. When a seller redeems a Shared Payment Token (SPT) funded by an Issuing card, the charge runs through your existing Issuing real-time authorization path, before capture and settlement. That guide says creating a PaymentMethod from an Issuing card requires private preview access, and the SPT requests use the preview API version 2026-04-22.preview. Treat that flow as something to check against the current docs before you build on it.
In other words, an agent buying something is now a normal source of issuing_authorization.request events, and every one of them is a two-second clock.
Shopify: 5 seconds, and the answer is an acknowledgement
Shopify’s webhook troubleshooting documentation says your app must respond within five seconds, and that a 200-series status counts as success. Its guidance for slow handlers is to delay processing until after you have sent a response.
The consequences of missing the window are spelled out too:
- Shopify retries failed deliveries up to eight times in a four-hour period, and the interval before each next retry increases.
- If failures persist, the subscription is removed. Removed subscriptions receive nothing until you create them again.
- The Dev Dashboard shows your 90th-percentile response time and your failed delivery rate. Failure rates above 0.5% are described as higher than average. Response times between four and five seconds are flagged as dangerously close to the limit.
The difference between the two providers is the key design point:
Stripe issuing_authorization.request |
Shopify webhooks | |
|---|---|---|
| Window | 2 seconds | 5 seconds |
| What you return | The decision itself | A 2xx acknowledgement |
| Work after responding | Not possible for the decision | Expected, and recommended |
| On a miss | Your timeout settings (or Autopilot) decide | Retries up to 8 times, then subscription removal |
With Shopify you can cheat the clock by acknowledging fast and working later. With Stripe Issuing you cannot, because the work you would defer is the thing Stripe is waiting for.
Anatomy of a 2,000 ms budget
Treat the window as a budget you spend, not a limit you hope to stay under. For a synchronous webhook, the time between Stripe sending the request and receiving your response breaks down roughly like this:
- Stripe to the tunnel edge (internet transit, TLS)
- Tunnel edge to the tunnel agent on your machine (the tunnel itself)
- Agent to your local server (loopback, effectively free)
- Your handler (parsing, verification, decision logic, any I/O)
- The same path back out
Here is an illustrative allocation. These are planning numbers, not measurements of any service:
| Segment | Planning allowance |
|---|---|
| Inbound network and TLS | 100–300 ms |
| Tunnel hop, both directions | 50–200 ms |
| Signature verification and parsing | under 10 ms |
| Decision logic | under 100 ms |
| Safety margin | 800 ms or more |
Notice what the table implies. If your handler does one cold database query or one outbound API call, you can burn the margin without noticing, and the tunnel is not the culprit. The only way to know is to measure.
A useful rule is to set an internal deadline well under the provider’s window, for example 800 to 1,000 ms for Stripe, and make your handler return its best answer by then, whatever state its dependencies are in. If you decide on your own timeout, you choose the fallback decision. If Stripe’s clock decides, your Dashboard settings (or Autopilot) choose it for you.
Measuring the tunnel hop
You cannot subtract what you have not measured. Use three measurements and compare them.
1. Time the handler itself
Instrument your own code. This is the number the tunnel cannot affect. Here is a minimal Node and Express example that reports its own duration with the standard Server-Timing header:
import express from "express";

const app = express();
app.use(express.raw({ type: "application/json" }));

app.post("/stripe/issuing", (req, res) => {
  const start = process.hrtime.bigint();

  // 1. Verify the Stripe-Signature header against req.body (the raw bytes),
  //    for example with stripe.webhooks.constructEvent().
  // 2. Run your decision logic.
  const decision = { approved: true };

  const ms = Number(process.hrtime.bigint() - start) / 1e6;
  console.log(JSON.stringify({ route: "issuing", handler_ms: ms }));

  res.status(200);
  res.set("Stripe-Version", "2025-03-31.basil"); // use a supported version, see Stripe's API versioning docs
  res.set("Server-Timing", `handler;dur=${ms.toFixed(1)}`);
  res.json(decision);
});

app.listen(3000);
The Stripe-Version value above is the one used in Stripe’s own example. Check Stripe’s API versioning page for supported values, because an invalid version header is a documented cause of webhook_error. Stripe’s docs also say to verify webhook signatures and allowlist Stripe’s IP addresses so you only act on genuine Stripe events.
2. Time the request end to end with curl
curl can break a request into stages. Each value is a cumulative timestamp from the start of the request:
curl -s -o /dev/null -X POST "https://YOUR-SUBDOMAIN.example-tunnel.dev/stripe/issuing" \
  -H "Content-Type: application/json" -d '{"test":true}' \
  -w 'dns=%{time_namelookup} connect=%{time_connect} tls=%{time_appconnect} first_byte=%{time_starttransfer} total=%{time_total}\n'
Run the same command against http://localhost:3000/stripe/issuing. The gap between the two total values, taken over many runs, is your tunnel overhead as seen from your own position. For a handler that verifies signatures, an unsigned test request will be rejected early. Either add a test bypass or send a correctly signed payload.
3. Compare percentiles, not averages
A budget is broken by the slow tail, not the median. Run a couple of hundred requests each way and compare p50, p95 and p99:
URL="https://YOUR-SUBDOMAIN.example-tunnel.dev/stripe/issuing"
for i in $(seq 1 200); do
  curl -s -o /dev/null -w '%{time_total}\n' -X POST "$URL" \
    -H "Content-Type: application/json" -d '{}'
done | sort -n | awk '{a[NR]=$1} END {print "p50="a[int(NR*0.50)], "p95="a[int(NR*0.95)], "p99="a[int(NR*0.99)]}'
Know what your measurement leaves out
Be honest about the limits of laptop-side measurement. When you call your own tunnel URL from the same machine, the request leaves your network, reaches the edge, and comes back down the tunnel to you. That hairpin path is not the path Stripe’s servers take, so it can overstate or understate the real inbound latency. Two ways to tighten it:
- Run the
curlloop from a small cloud VM in a region near the provider’s likely origin, so the inbound leg resembles reality. - Log a receive timestamp in your handler and compare it with the event’s own creation time. Stripe’s event timestamps are in whole seconds and your clock may be skewed, so use this only to spot gross delays, not to measure milliseconds.
Using request logs to see what actually happened
Measurements from a loop tell you what is possible. Request logs tell you what happened when the real provider called. When a Stripe authorization comes back as webhook_timeout, you want to answer one question: did the request reach my machine at all, and what did my handler do with it?
InstaTunnel’s CLI documents an --logs flag that polls live request logs, and states that request logs require the Pro or Business plan. That gives you a record of requests that crossed the tunnel, which you can set against your handler’s own logs and against Stripe’s request_history for the same authorization. A practical workflow:
- Find the authorization in Stripe and note its
request_history.reasonandreason_message. - Find the matching request in the tunnel’s request logs. If it is missing, the problem is upstream of your laptop. If it is present, the problem is in or after your handler.
- Match it to your handler’s structured log line and its
handler_msvalue.
Keep your handler’s own duration log as the source of truth either way, since a tunnel’s log view is a record of traffic and not a substitute for timing your own code.
On the Shopify side, the Dev Dashboard’s Logs page lists individual deliveries from the past 7 days, filterable by topic, status and shop. Shopify notes that this view is not real time and data can lag by up to several minutes, so do not conclude a delivery is missing right after it fails.
Keeping a laptop handler fast
A laptop is a fine place to build a synchronous handler and an unforgiving place to run one if you ignore its habits. These are the common ways local handlers lose their budget.
Eliminate cold paths
The first request after idle time is often the slowest. Connection pools are empty, caches are cold, and a language runtime may still be warming up. Before a test, send a few throwaway requests. During the test, keep database and HTTP clients alive and reuse connections instead of opening a new one per request.
Decide from memory
For Stripe Issuing, design the decision to need no network round trip at all. Load your spend rules, merchant category allowlists and per-card limits into memory at startup and refresh them on a timer. The authorization payload already carries the merchant details and the metadata you attached to the card, and Stripe’s agent docs suggest common checks such as matching the business to the agent’s task, confirming the amount against the expected budget, and flagging unusual transaction velocity. All of these can run against in-process data. A decision that reads a few in-memory maps takes microseconds. A decision that waits on a remote database is a lottery ticket against the clock.
If your agent platform wants a model to judge a purchase, do that analysis ahead of time and cache the verdict, or have the model set the card’s controls up front. Stripe’s docs say spend limits and merchant category controls are set at card creation and can be updated at any time. A model call inside the two-second window is the most expensive place to put judgment you could have encoded earlier.
Put every outbound call behind a deadline
Wrap anything that can block in a timeout, and make the fallback decision explicit:
const controller = new AbortController();
const timer = setTimeout(() => controller.abort(), 400);

try {
  const risk = await fetch(RISK_URL, { signal: controller.signal });
  // use the result
} catch {
  // timed out: apply your documented default policy
} finally {
  clearTimeout(timer);
}
Choose the default deliberately. Declining protects spend but frustrates a legitimate purchase. Approving keeps agents flowing but widens exposure. Whatever you choose, write it down, because Stripe will otherwise apply whatever your timeout settings say.
Tame the machine
- Power and sleep. A laptop on battery may throttle the CPU, and a sleeping laptop answers nothing. Stay on power and keep the machine awake while testing.
- Wi-Fi jitter. Wireless links add variable delay that the median hides and the p99 reveals. Test over Ethernet at least once to see how much is your radio.
- Background load. A local build, a container pulling images, or a sync client can steal CPU exactly when a request lands. Check what else is running before you trust a bad number.
- Debug mode. A debugger paused on a breakpoint will blow any budget. Use logging, not breakpoints, for latency tests.
Acknowledge first when the provider lets you
For Shopify, return 200 the moment the payload is received and verified, then queue the real work. Persist the raw event to a local queue or file before you respond, so a crash after the acknowledgement does not lose data. Because retries mean the same event can arrive more than once, make downstream processing idempotent. Shopify’s “Verify deliveries” page covers HMAC verification and handling duplicate deliveries. If your app goes offline for a long stretch, Shopify’s recovery advice is to re-subscribe where needed and re-import the missing data.
A pre-flight checklist
Run through this before you register a tunnel URL with a provider for synchronous events:
- Know the window: 2 seconds for Stripe Issuing real-time authorizations, 5 seconds for Shopify webhooks.
- Set an internal deadline well inside the window.
- Measure handler time, then total time through the tunnel, at p50, p95 and p99.
- Warm the handler and reuse connections.
- Keep decision data in memory.
- Give every outbound call a hard timeout and an explicit fallback.
- For Stripe, return the decision directly with a valid
Stripe-Versionheader, verify signatures, and watchrequest_history.reasonforwebhook_errorandwebhook_timeout. - For Shopify, acknowledge first, queue the work, and watch the Dev Dashboard’s p90 response time and failure rate.
- Keep the tunnel URL stable between runs so you register it once.
- Review the request logs after every miss.
Testing without waiting for a real card
You do not need a physical card swipe to exercise the path. Stripe provides Issuing test helpers, including an Authorization Create API that simulates a new authorization on an Issuing card. There are matching helpers for incremental authorizations and reversals. Configure your real-time authorization endpoint in your Issuing settings with your tunnel URL, create authorizations through the helper, and watch what arrives. Run it in batches so you see tail behavior and not one lucky request.
Stripe’s docs also describe a lighter local loop. stripe listen --forward-to localhost:4242/webhook forwards events to your server, and stripe trigger issuing_authorization.request fires a test event from the CLI. That is handy for checking your logic. For measuring tunnel latency, send traffic through the tunnel itself.
For Shopify, the Dev Dashboard lets you trigger a delivery by updating your dev store, for example by creating a product to fire products/create, and then read the delivery’s response time.
The takeaway
Synchronous webhooks turn latency into a correctness requirement. Stripe gives you 2 seconds to produce a decision. Shopify gives you 5 to produce an acknowledgement. Neither window is generous once you add the internet, a tunnel, and a laptop that is also running your editor.
The good news is that the budget is easy to manage once you stop guessing. Measure your handler, measure the full path, look at the tail, keep decisions in memory, put deadlines on every outbound call, and read the request logs when something misses. Do that, and the tunnel becomes one small, known line item instead of the suspect in every timeout.
Sources
- Stripe: Issuing real-time authorizations
- Stripe: Issuing authorizations
- Stripe: Issuing for agents
- Stripe: Pay with a Shared Payment Token from an Issuing card
- Shopify: Troubleshoot webhooks
- InstaTunnel: CLI README
Originally published at https://instatunnel.my/blog/webhooks-that-wait-latency-budgets-for-synchronous-events


Comments
Post a Comment